Thursday, September 22, 2011

Cream cheese pudding

Ok. So the recipe isn't actually for pudding. It's a step-by-step photo guide to making flans. But, in Bangladesh, the words "flan" is never used, although..there isn't a single home where it isn't made, cherished and devoured. Out of respect for the fond memories, I'll keep using the word pudding instead of flan throughout this post. Bear with me. :p
Pudding in Bangladesh is usually made with sugar, milk and eggs. Here, I've added cream cheese to the egg, milk mixture which takes it closer to a cheesecake, but without the added calories. This is a simple twist on a classic take and really, really easy to make. 

Recipe
Prep time: 15 minutes
Bake time: 1 hour and 20 minutes

3/4 cups sugar
1 can evaporated milk
1 can sweetened condensed milk
8 ounces cream cheese (low fat is fine)
5 eggs
1 teaspoon vanilla

First, pre-heat the oven to 350 F. Now put sugar in a heavy bottomed saucepan over medium low heat. It won't be long before the sugar starts boiling.
 
  
Be patient, it'll seem like forever (more like 5-8 minutes..) but the sugar will caramelize to a nice golden color. This is the only tricky step to making a caramel pudding. Once the sugar turns golden remove the pot from the   stove as the residual heat will continue to cook the sugar some more and you don't want burnt sugar. That's just wrong. 

Working quickly but carefully pour the golden caramel into a 9 inch cake pan. The sugar is very very very hot at this stage and will burn if it comes into contact with skin.

After pouring the caramel, soak the pot in warm water. This makes for an easier clean up afterwards.
Now onto the next stage...Gather all the ingredients. Make sure the cream cheese is at room temperature, that way it'll mix easily with the other ingredients.

And blend...

Pour into the cake pan with caramel already in it.

Bake in a water bath. This just means that you put the cake pan in a bigger dish and pour boiling water that'll come upto about 1/3rd to 1/2 of the pan. Don't go over board with the water as you don't want any to get into your pudding mixture.

Insert a clean knife into the pudding after 1 hour and 15 minutes. If the knife comes out clean your caramel pudding is ready. If the pudding still seems liquidy give it 10 more minutes and check again. You do not, I repeat, do not want to overcook the pudding. There's nothing worse than a hard, rubbery pudding. Take it from someone who knows. When you take out the pudding it should wiggle a little when you shake it.

I tested to see if it was done a couple of times. Hence the marks on the surface. But the pudding will be flipped and will look pristine and no one will be able to tell.

Once the pudding cools down run a knife along the edges. Then place a flat plate on top of the baking dish and flip it over in one single motion. The pudding should fall right out. This takes a little practice. But, hey, even if it breaks it'll still taste great.


Chill for at least 4 hours to over night. Slice off a piece and enjoy.
 Didn't I tell you it was gonna be easy. :)

Saturday, September 10, 2011

Thai Flavored Whole Fish

I absolutely LOVE cooking whole fish. Although I mostly make fish curries, sometimes it feels good to have something a little different. The fish here is deep fried and then cooked using Thai ingredients that provides for an amazingly light yet flavorful sauce.     


I've used croaker for this recipe but feel free to use any white fish of your choice like tilapia or snapper. 


Recipe


Prep time: 10 min
Cook time: 30 min


Juice of 1 lime
Rice flour (Use corn starch or regular flour if you don't have rice flour on hand)
salt
1 cup oil for deep frying


Sauce:
1 tablespoon lime juice
1 tablespoon soy sauce
1 teaspoon Sriracha (thai chili sauce)
1 tablespoon sweet chili sauce
1 tablespoon fish sauce
1/2 teaspoon dark soy sauce (dark soy sauce is a sweeter, thicker version of regular soy sauce) (optional)
2 green chillies (don't slit the chillies if like your food less spicy )
1/4 cup water 
1/2 cup basil leaves 


Clean the fish really well and pat dry with a paper towel. Put 2-3 deep gashes into each of the sides of the fish at an angle. Make sure the gashes are at least an inch apart from each other or the fish will break when frying. Now rub the juice of one lime and salt (according to taste) on the fish and leave it to marinate for 10 minutes. Don't forget to rub some juice on the insides as well. 

 After marinating, sprinkle enough rice flour to gently coat the fish, shake off excess flour and deep fry till the fish is cooked completely. A perfectly fried fish will have crispy skin and the slashes will open up.

One great tip about frying fish- never flip the fish too early otherwise it will stick to the pan and break. Give each side 3-5 minutes before flipping over gently. 

Dry the fish on paper towel after you've fried it and heat up 1 tablespoon of oil in a pan large enough to hold the fish. Put all the other ingredients except for the basil and cook for 2/3 minutes. Add a small amount of water (about 1/4 cup) if the sauce starts to stick to the pot. Stir constantly while the sauce is cooking and taste test to see if it needs more salt. Now, add the fish and cook uncovered for 5 minutes on each side. 

The fish will soak up all the lovely flavors of the sauce within a few minutes and a few minutes before taking it off the heat add Thai basil. Regular basil works fine too but the subtle aroma of Thai basil enhances the flavor so much more that it's worth getting some. 


This fish is best served warm with enough rice to mop up all that delicious sauce.

As always.. ENJOY!! :)

Tuesday, September 6, 2011

Beef Patties

I've started dental school last week. :)
Things aren't crazy busy yet but it's getting there.God knows when I might be able to post again. Before I take a short break I wanted to post a recipe one of my dear friends (you know who you are!!) has been asking for. This is one of those dishes very close to my heart. "Google" it you'll find Jamaican beef patties everywhere but not the Bengali kind. The kind of beef patties I grew up with were made with a spicy mince meat filling inside a puff pastry crust. The meat is cooked first with different spices, made into triangular shaped patties, and then baked for 20 minutes. Once made, the unbaked ones can be stored in the freezer for 3-4 weeks but in my house they rarely last that long. Without further ado, here's the recipe.

Beef Patties 

Makes 25-27

Prep time: 30 min
Cook time: 20 min
Bake time: 20 min


Minced Meat(Keema in Bengali)- 1 lb
Oil- 2 tablespoons
Medium sized onion- 1
Green chili- 4
Ground pepper- 1/2 teaspoon
Soy sauce- 2 tablespoons
oyster sauce- 2 tablespoons
Ginger paste- 2 tablespoons
Garlic paste- 3 tablespoons
Cumin powder- 1/2 teaspoon
Salt- 1/4 teaspoon
Corn flour- 1 tablespoon
Store bought puff pastry sheets

To make the filling slice a medium onion into thin half moon shaped slices.

 Fry in oil till they are translucent and barely start to get color.

Then add the minced meat and all the other ingredients except for the corn starch and cook on medium heat for 15-20 minutes, till the meat is cooked completely.

Add the corn starch 3-5 minutes before taking the pot off the heat and make sure to cool the filling first before making patties. Adding the corn starch will ensure that the filling sticks together as opposed to crumbling apart.

Now that the filling's ready, it's time to take out the pastry.

I use Pepperidge Farm puff pastry sheets when I'm making this. Each box has two sheets and from each sheet you get 18 patties. So for a pound of meat, I use one and a half boxes which makes 27 patties.

First thaw the sheets according to package directions and open up the folds. I usually do one sheet at a time. Lay it flat on a surface and cut into 9 pieces following the folds.

Place about 1 tablespoon of the cooked minced meat mixture on each square.

Seal the edges really well forming little triangles.

Here's another random shot of a few more right before they head to the oven.

Bake at 425 degrees F for 20-25 minutes till they get a vibrant golden color. Pick your favorite condiment and enjoy!! :)


Friday, August 12, 2011

Shrimp roll

You know what’s better than having a warm bowl of soup. Having a warm bowl of soup (check out my recipe for Tom Yum soup) and munching on shrimp rolls that are crispy and delicate at the same time.

The outer layer of this popular Bengali restaurant dish is made with spring roll wrappers you get at your regular grocery store but the marinade requires a couple of specialty sauces, two to be exact. Thai sweet chili sauce and green chili sauce. The combination of these two sauces imparts a mildly sweet yet spicy flavor that makes these rolls very different from your regular spring rolls. Both sauces  are available at Asian markets or Indian groceries and will be a great addition to your pantry as they are good for a couple of months and can be used in a myriad of different dishes.

Also did I mention....
these rolls are made with whole shrimp and nothing else and then deep fried.   Bake them for a healthier version but sometimes it just feels soo good to indulge.

Recipe
20 shrimps
10 sheets of spring roll wrapper
1 teaspoon minced garlic
1 teaspoon soy sauce
1/2 teaspoon sesame oil
1/2 teaspoon black pepper
1 tablespoon sweet chili sauce
2 teaspoon green chili sauce
1 teaspoon corn starch

To seal the wrapper 
1 tablespoon water
1/4 cup water

Fresh shrimp from the farmers market. You can also buy tail on raw shrimp to make your life easier. I, for one, don't mind the extra work. I'd rather go the extra mile.
Clean and devein the shrimp and nick the inside a couple of times so that the shrimp don’t curl up. Here’s a little clip that demonstrates how to keep shrimp straight.


Get the marinade ready.
Marinate for 15 minutes. Doesn’t look very appetizing does it? Patience grasshopper. ;)
Soak up excess moisture with a paper towel. Cause we all know what happens if there’s water when you are deep frying. Don’t wory about the shrimp being bland as they’ve already taken in all the flavor.
Now comes the fun part. Wrapping up the shrimp. First gather the wrappers together. Cut them diagonally
 Make sure to keep them covered under a wet kitchen towel. Otherwise they'll dry up and will be harder to roll.
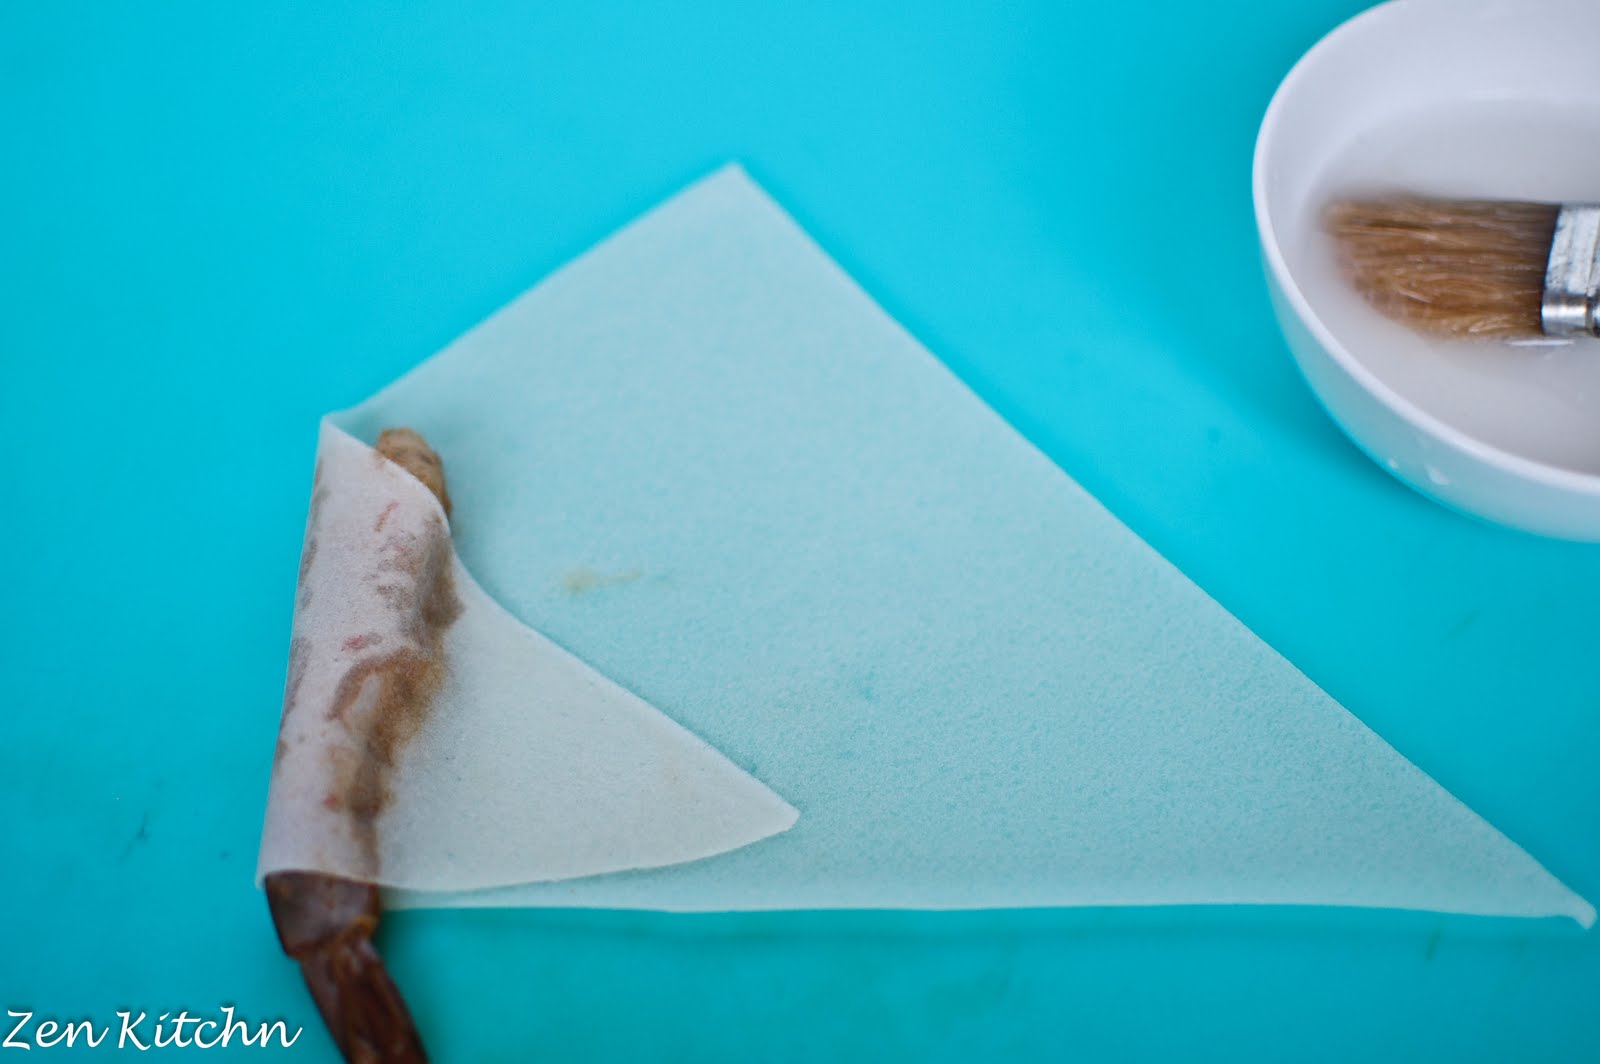
Take one of the triangles and place a scored shrimp on it like so
Fold one corner over tightly covering the shrimp. Make sure it's a tight wrap.
Roll it once and then fold the top over.
Keep folding till you get near to the other corner and brush some cornstarch-water mixture on the edge and seal it good
Keep repeating till all the shrimps gone
Deep fry the pieces in oil that's about 350 degrees F. When the rolls are added the oil should bubble vigorously. Enjoy with sweet chili sauce.

Wednesday, August 3, 2011

Papaya Mint Lemonade

It's always fun to take a common everyday thing and to give it a little twist to turn it into something fabulous. I'm not much of a papaya fan but in my effort to add more fruit and vegetable to my diet I have recently started blending up fruit.


Things to know before buying a papaya:

Papaya is a member of the pawpaw family. 

It supplies a whole days worth of vitamin C among other things. 

Take care when buying them as they bruise easily. 

Try to buy one that is soft to touch but not mushy. If you do get an unripe one place it in a paper bag with a banana. The ethylene gas released by the banana will ripen the papaya after which it can be stored in the fridge for up to a week.


This recipe is one of those that was created out of necessity. I had a papaya that was going to go bad unless it was used up quick. So I made a papaya lemonade. I hope it gives you an idea on how to use up papayas, or melons that you might have lying around the house.

Recipe
3 cups of papaya
1 cup of lemon juice
1 cup of sugar (add more as needed)
4 1/2  cups of water
1/2 cup of mint
ice cubes (if desired)
Generally half of a large papaya peeled, seeded, and chopped makes 3 cups.


Add lemon juice, water, mint and sugar.


Blend and strain into a pitcher. I don't like lumpy drinks so I strain most everything. Don't strain it if you don't mind a chunk or two of papaya in the drink.


Chill for a few hours, pour into a glass, drink up and pat yourself on the back for adding more fruit to your diet. 

Raita – A Yogurt Sauce Made Bengali Style

Raita is a thin yogurt sauce that goes really well with kababs. The marriage between raita and kabab is what makes a beautiful kabab dish glorious. It is similar to the Greek tzatziki sauce… but without the garlic or the olive oil and tastes absolutely divine. 

The recipe is also very flexible as you can add as much or as little onion and cucumber to the sauce if you so desire. The only step special step requires the preparation of a coarse powder made from dry roasted cumin seeds and mustard seeds. Other than that,  you just dump everything together, give it a quick whiz in the blender and voila, you have raita.

So the next time you are having kabab or tandoori chicken make sure you mix up a batch of raita. I promise you won’t regret. :)

Recipe
1/2 cup yogurt
1/4 teaspoon salt
1/2 teaspoon sugar
quarter of a small green chili
1/2 teaspoon green chili paste (availablt at Indian grocery stores)
1/2 teaspoon dry roasted cumin and black mustard seeds 


Take 1 tablespoon of cumin seeds and 1/2 tablespoon of mustard seed and dry roast it. Remember to continuously stir it as you don't want the spices to burn. If it does, cut your losses and start from the beginning. This is only take 3-4 minutes. The minute the seeds release a strong aroma take your pan off the heat.


Cool the seeds for a few minutes and place in a mortar and pestle or a spice grinder or anything else you want to use to crush them.


Grind to a coarse powder.


In an airtight container this powder stays good for a few months.


Mix all the other ingredients in a blender making sure not to use more than 1/4 of a green chili as this will be plenty hot. If you use more the raita loses its traditional taste and tastes a bit bitter.

Now pour into a bowl and stir in cumin-mustard dry roasted powder and raita is done.

Beef Sheekh Kabab

If I was left alone on an island and could only eat one food for the rest of my life I would pick Sheekh Kababs. I think I know I could eat these for every meal of every day for the rest of my life and still love it as much as the first day I savored the my first bite as a young girl.

What is commonly known as Shish Kabob in America is called Sheekh Kabab in my part of the world. As opposed to using ground meat (the way it is done in many parts of India) in Bangladesh the meat for the kabab is sliced thinly, marinated overnight and grilled over very hot coal, all the while being basted with oil to preserve the succulence of the meat.


Although nothing compares to the lovely charred flavor you get from grilling, it is possible to make it in your home oven like I frequently do. But first, before we move on to the recipe, there are a few details one needs to be mindful of to produce restaurant quality kababs.

Fact 1: Extra moisture can very easily ruin the kabab. After one quick rinse the meat needs to be dried completely with a paper towel to get rid of extra water.

Fact 2: Meat tenderizer is a must for soft, tender, melt-in-your-mouth kababs.

Fact 3: Water also needs to be squeezed out from all the other pastes.

Fact 4: If using regular yogurt, place in a cheese cloth or paper towel and put in a strainer for a few hours so that extra liquid seeps out.

Fact 5: It is best to get all the masalas, including the tenderizer from an Indian store. The tenderizer from your regular grocery store is salted and will not make the meat tender as it should be. I recommend using Shan brand meat tenderizer.

Enough of my blabbing. Now on to the recipe.

Recipe

1 pound thinly sliced meat
1 tablespoon chili powder
2 teaspoons cumin powder
1 teaspoon coriander powder
1 teaspoon garam masala
1 teaspoon meat tenderizer
½ teaspoon salt (add ¼ teaspoon more if you like your food salty)
½ cup fried onion (also sold in Indian grocery stores)
¼ cup sour cream
2 tablespoons greek yogurt/ strained yogurt
1 tablespoon garlic paste
1 tablespoon ginger paste
1 tablespoon lime juice
¼ cup shredded mozzarella
2 tablespoons oil

First, the slices need to be as thin as possible.


Gather all the dry masalas together.


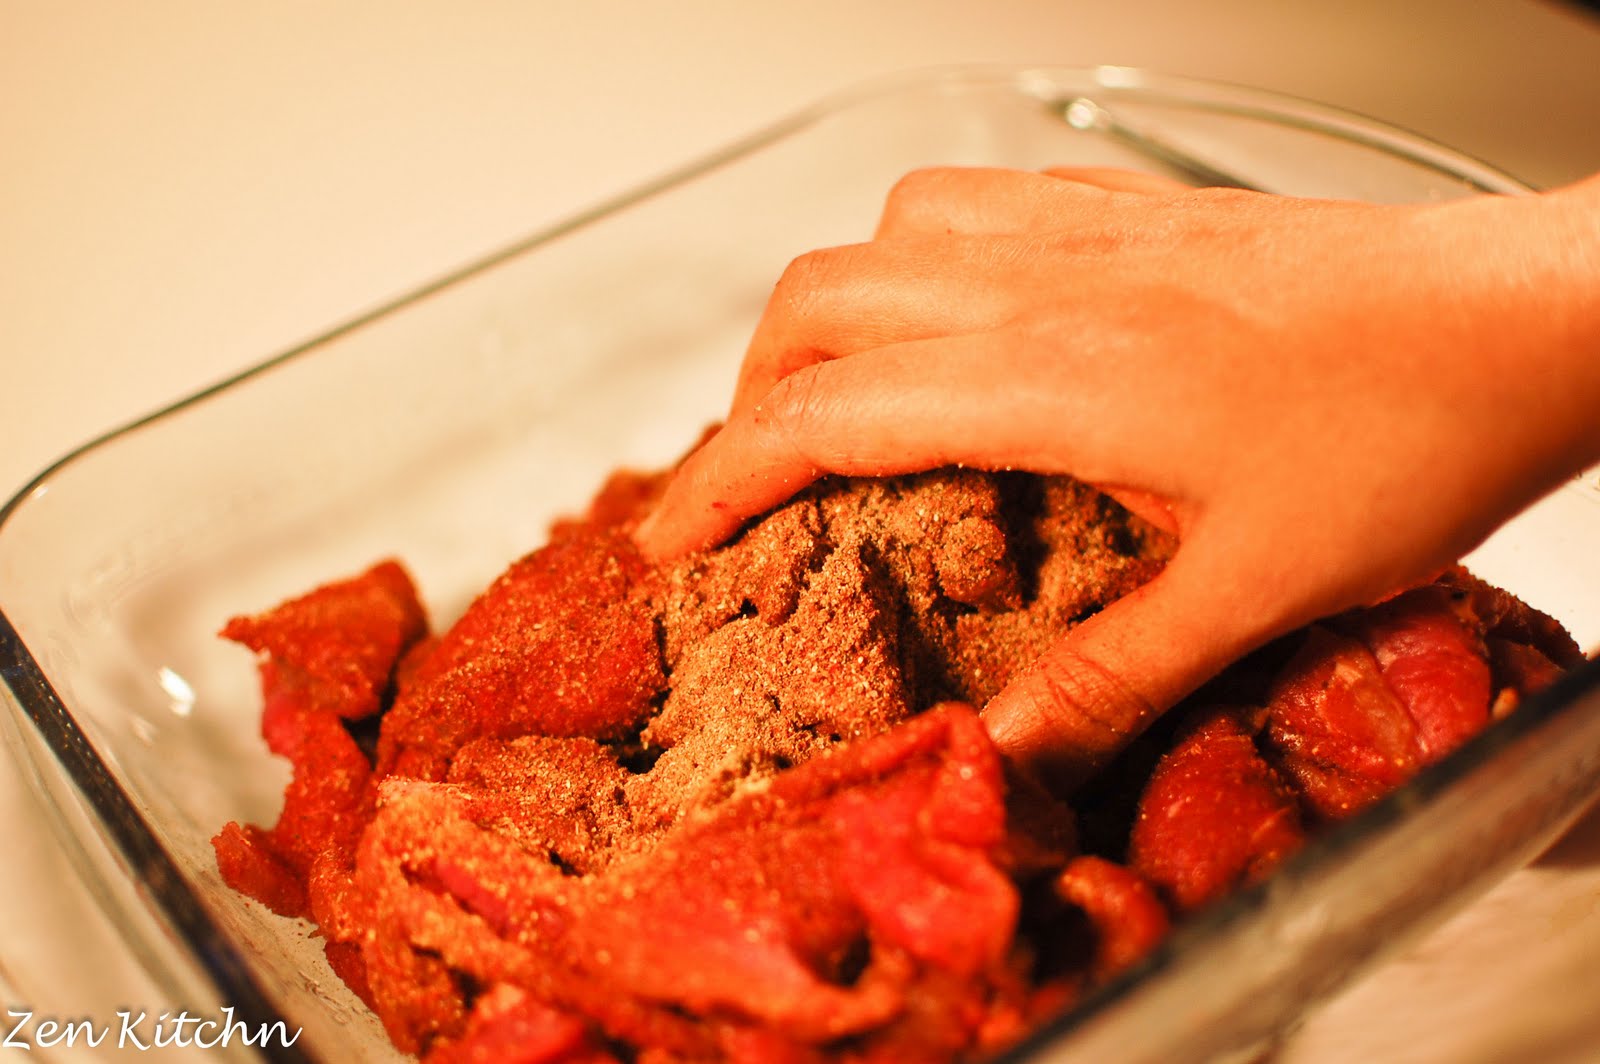
Mix it all together and sprinkle it on.


It’ll be hard to coat all the pieces because the meat should have no water other than what’s inside. 

Remember, your hands are your best tools for the job.


Let it rest while you mix all the other ingredients. Mash up the mozzarella with the palm of your hands till it turns into a paste form.


Mix everything together and marinate overnight.


I usually stick the skewers in an empty soda bottle filled with water, close the lid and let it sit for 30 minutes before using. Otherwise the wood will catch fire in your oven.
Trust me, it will not be a pretty sight... :p 


After waiting overnight (or a few hours if you are impatient), thread the slices onto the skewers that have been taken out of the water and wiped dry.


Pre-heat your oven to 450 degrees Fahrenheit and bake in the middle of the oven for 15 minutes. Flip the kababs over and bake for  another 15 minutes.


Depending on your oven the kababs should be ready. If you like it a bit more charred, broil for a few more minutes.


Enjoy with naan and raita. :)