Showing posts with label dessert. Show all posts

Monday, August 13, 2012

The Perfect Jilapi (Jalebi)

It's been little more than two months that I've been in Spokane and I'm already deeply in love with the town. It's been a glorious summer and a much needed break after a grueling first year of dental school. But leave I must. I fly out to Philadelphia tomorrow to start my second year of classes. Oh Penn, how I hate you right now. It's hard to imagine three more years of flying back and forth. But, since I've managed to survive this far hopefully I'll live through the rest as well. On the bright side, I do get to see my friends after the break. So it can't be all that bad. Enough with the whining. Let's simply end the summer on a sweet note, making something that reminds us (me and the hubby) of home and warmth and sweetness.

Traditionally sweets, such as the one I talk about today are a very integral part of Bengali culture. They are offered when guests arrive or they are treats that guests bring as gift. There is a warm, soothing quality to it which comes from the gentle use of spices like saffron or cardamom and the rich sweetness solidifies their status as cherished treats. Being deep fried and then soaked in a flavored sugar syrup, it is not the usual end to an everyday meal. But for special occasions there can be nothing better than a Jilapi/ Jalebi.

This is a relatively hard dish to master but the end results are completely worth the pain.

Jilapi batter
1 cup plain flour
1 and ½ tablespoon gram flour (besan, also known as chickpea flour)
1 teaspoon yeast
1 tablespoon oil
1 teaspoon sugar
3/4 cup of lukewarm water

Sugar syrup
1 cup sugar
1/2 cup water
1/2 teaspoon lemon juice -- to prevent crystallization
1/2 tablespoon rose water (optional)
pinch of cardamom powder (optional)


Dissolve yeast in warm water and wait for 5 minutes till the yeast blooms.

Add all the ingredients to make the batter. You can choose to add more or less water to achieve the right consistency, which should be like a pancake batter. Leave aside covered with a clear wrap or a kitchen towel for at least an hour.

If you are making jilapi the next day it's completely ok to stick this in the fridge. Just make sure to take it out at least an hour before you actually fry the batter.

Now onto making the syrup. Heat up the sugar water mixture and stir with a wooden spoon. Boil till you reach a one thread consistency ( at the thread stage there's still a lot of water left in the sugar and the temperature on a candy thermometer should be around  215 degree F or 101 degree C). At this stage, usually I barely touch the spoon with my index finger, then touch the index finger with the thumb and gently pull apart. If one thread is formed then the syrup is done. And you immediately switch off the flame. If you feel that the sugar is getting too thick add a little more water and boil again. If you will be adding cardamom, saffron or rose water do it at the beginning or the end. It really makes very little difference.

Now on to the actual frying bit. Heat up at least an inch of oil in a cast iron skillet or your favorite frying pan. The oil needs to be at a temperature so that when you drop a little batter it sinks for barely a second before rising to the top and sizzling.

Hold the empty bottle or ziplock bag full of jilapi batter (with one end snipped) and pipe concentric circles into the hot oil quickly making sure to join the ends. Speed is your best friend here. Do it slowly an you end up with squiggly jilapi. But it'll still taste good.

Fry the jilapis till they are golden brown on both sides. and set aside.

Transfer the fried jilapi one by one into the sugar water slurry and dip completely for 20-30 seconds. The hollow jilapi will take in the flavored sugar syrup while remaining crispy on the outside.

Serve warm.
Enjoy.
Do not eat everyday.
That is all...

Friday, August 10, 2012

Rose Water Crème Brûlée Infused with Saffron

Crème Brûlée..
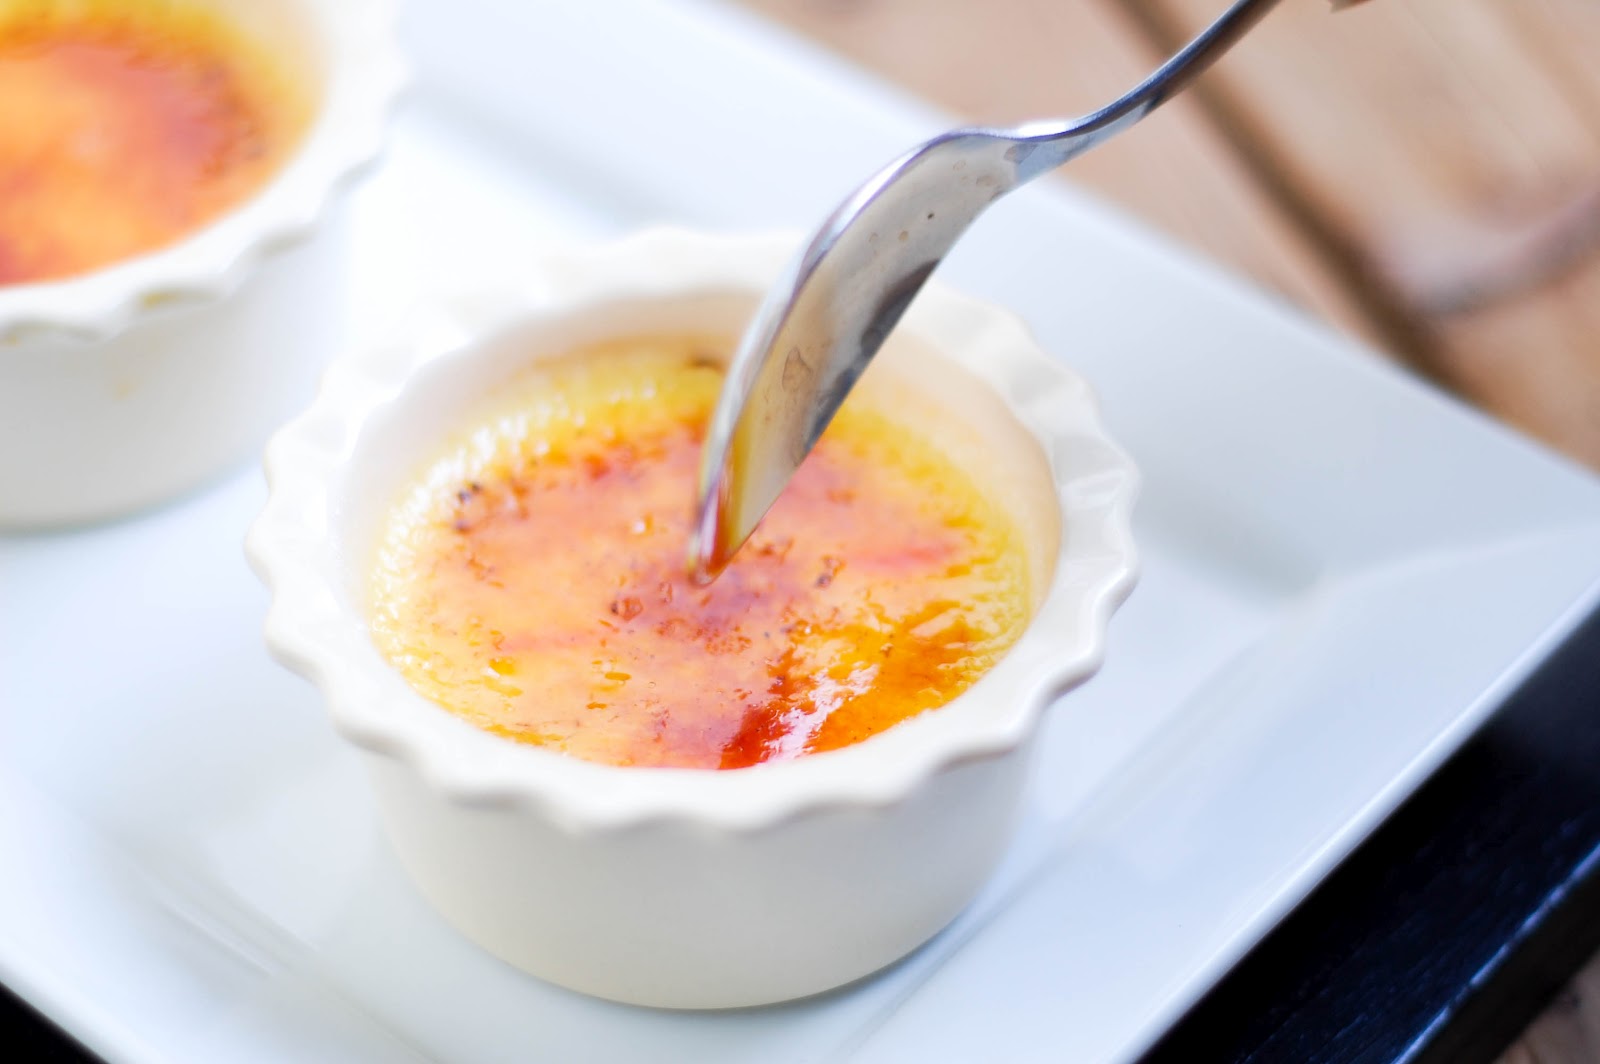
I barely have words to describe how delicate this dessert is. My heart gives a little leap of joy every time I break through the thin crisp layer of caramelized sugar to sample (read devour) the velvety smooth custard underneath. And best of all, it is as easy to make as it is delicious. Over the years I've made Crème Brûlée with vanilla beans and never did I consider that such perfection could be improved. But, as always I am happy to be proven wrong. I'm glad to report that flavored with saffron and rose water, this iconic French dessert is elevated to a whole new level. Go on. Buy some saffron this weekend. It's absolutely worth the splurge. Also, if you don't own a kitchen torch you could just leave out the whole caramelization bit, call it rose water and saffron pudding and no one would be the wiser.

Crème Brûlée
1 1/4 cup heavy cream
3 extra large egg yolks (60 grams)
2 tablespoon + 2 teaspoon sugar (40 grams)
1 1/2 tablespoon rose water
1/4 teaspoon saffron

First thing's first. Pre-heat the oven to 325 degrees F.


Then, begin by heating the heavy cream till you see bubbles around the edge of your non stick pan. You do not want the cream to come to a boil. All you need is for it to simmer gently.


Now turn off the heat and add crushed saffron. Give it a quick stir, cover the pot and forget it exists for the next 10 minutes.

In the meanwhile mix the yolk with sugar till it dissolves. You keep mixing till the color of the yolk appears to be a little lighter.

Add the saffron cream mixture (which has taken on a delicate yellow hue by now) to the yolk sugar concoction while stirring continuously. 

You'll see that this recipe does not make a lot. This is because it's hard to stop eating this dessert if there's a lot in the fridge. So, unless you are making for company stick to making small amounts. You waistline will thank me.

Now back to the recipe. Strain custard into a pourable container (a 2 cup measuring dish perhaps) and pour equal amounts in four ramekins that have been placed in a rimmed baking pan. It doesn't matter whether the pan is made of glass or not. As long the little dishes fit comfortable, you are fine.


Stick the pan into the oven and fill up the pan with boiling hot water so that the ramekins are half submerged in water. Bake for 40-45 minutes or until the custard barely sets. The center should still jiggle when you take it out of the oven. As the residual heat from the ramekins will finish the cooking process.
I can not stress how important this is. To get the best consistency, the custard needs to be taken out before the center's completely set.


Now chill the custard in the fridge overnight or at least an hour or two. I don't know if you've noticed but these are different ramekins, as the first batch was gone before I could take pictures.
                           

Spread a thin layer a sugar on top and caramelize with a cooking torch or a small propane torch available at hardware stores.
 The sugar bubbles and sizzles...

Before settling down to form a crisp layer.

Chill for 5 minutes to cool down the custard. Break open with a spoon.

And cherish every bite

Sunday, July 15, 2012

Cake Roll with Mango Curd, Whipped Cream and Chopped Strawberries

Guess who went strawberry picking the other day..


Even in the 95 degree weather picking was the easy part. These keep for but a few days. Hence the next few posts will revolve around these ruby red lovelies. And as I keep telling my friends...Strawberry desserts for a month....:)

The first in the series is a simple roll cake flavored with a thin layer of mango curd, sprinkled with little bits of fresh strawberries, then topped with sweetened whipped cream and rolled up to sweet perfection.

Sheet Cake(The recipe comes from Nick Malgieri's Perfect Cakes and Epicurious, May 2009)
3 large eggs
3 large egg yolks
Pinch of salt
3/4 cup sugar
1/2 cup cake flour (spoon flour into dry-measure cup and level off)
1/4 cup cornstarch (spoon flour into dry-measure cup and level off)

Mango curd

Whipped cream
1 cup heavy cream
1 tablespoon sugar

First thing's first. Position the rack in the center of the oven and preheat the oven to 400 degrees. Butter or coat a jelly roll pan with vegetable spray. The pan I used was 12 x 17 x 2 inches.


Line with parchment paper and then spray the paper. If using butter, butter both pan and paper. You do not want this cake to stick.


Measure cake flour by first scooping into a measuring cup and sift flour into a separate bowl. 

Then spoon the sifted flour into measuring cup. If you do not precisely measure the sifted flour this cake will give you trouble.


Here's a picture of how much extra sifted flour I had left after measuring into my cup.
 

Enough about four. Now onto eggs. Take eggs in a large enough bowl. After beating the volume will increase by 3 fold. So you need room for that.


Add sugar.


Whisk away over a pot of simmering water till the mixture reaches 100 degrees. A quick way to check this is to gently test the egg sugar mixture. you should not be able to feel the gritty sugar when you rub the mixture between fingers. It'll also be about body temperature. If you go higher you will get scrambled eggs. So stop when you feel that the mixture is hot. Or as an alternative use a kitchen thermometer.


Whip on medium-high speed until the egg mixture is cooled (touch the outside of the bowl to tell) and tripled in volume. The egg foam will start off yellowish and very thin.


But it'll start getting thicker.


And thicker.


And thicker.


You are done when it forms a slowly dissolving ribbon falling back onto the bowl of whipped eggs when the whisk is lifted.


Gently fold in sifted cake flour and corn starch mixture.


Only mix till you can't see flour anymore. Do not over mix or your batter will lose volume.


Pour into the prepared pan.


Bake for 10-12 minutes. Take out when the cake starts pulling away from the sides like so.


Flip onto another piece of parchment paper. The bottom is now the top.


Peel off the parchment and cool on a cooling rack.


Almost there now. Just a bit longer. Chop up strawberries and whip up heavy cream with sugar.


After the cake has cooled down completely spoon mango curd onto the cake.


In a nice thin layer.

Sprinkle strawberries.

Spread whipped cream.


Spread it out.


Roll it up tightly and chill in the fridge for atleast half an hour.


Sprinkle some icing sugar on top.
 

And enjoy. :) 


Monday, July 9, 2012

Mango Curd

A very basic recipe that makes a silky smooth mango curd. Different fruit purees can be used.
Possibilities. Endless...

The recipe has been modified from Bon Appetit, June 1998 and Smittenkitchen

1 cup mango puree/pulp (I used the canned pulps available in Indian grocery stores)
6 yolks from large eggs
4 tablespoons of sugar
3 tablespoon lime juice
2 tablespoon butter

Place everything except butter in a metal bowl


Whisk together to mix everything up.


Set bowl over a pot of simmering water making sure the bottom does not touch the water.


Whisk and after about 20 minutes the curd will start to thicken. Once it starts thickening keep whisking otherwise there will be lumps and bye-bye silky smoothness.


Whisk until curd thickens and reaches 170 degrees F. In the absence of a kitchen thermometer thicken till it clings to your whisk.
Cool and preserve in a jar of your choice. Keeps well for up-to two weeks in the fridge.


Can be spread on scones, bread, used as a filling for cakes, tartlets, and swiss rolls. Check back soon to see how I use it up. :)