Tuesday, June 26, 2012

Stuffed Mushrooms

The best kept secret since no-knead bread would be the fact that it is A-ok to wash mushrooms. Forget about brushing or wiping with damp paper towel to clean the mushrooms. Not only does it take longer but look closely and you will find dirt in the crevices. So take your simple button mushrooms give it a wash under cold water and let's get to stuffing them.

Stuffed mushrooms- the recipe is from epicurious.com. I tweaked just a wee bit.

18-20 mushrooms
2 tablespoon extra virgin olive oil
1/2 cup chopped shallots/ onions
3 garlic cloves
7-8 oz shrimp
2/3 cup Panko bread crumbs
1/2 cup Pecorino Romano
1/4 cup mayo
1/4 cup chopped basil
 pinch of pepper flakes

The hubby brought home fresh button mushrooms the other day and I had this 'urge' or dare I say 'need' to stuff them.

Being fresh the stems popped right out. I saved about half the stems to add to the stuffing mixture. If yours does not come right out run a knife along the edge of the stems to get it to come out.

Grate yourself some fresh Pecorino Romano or Permigiano Reggiano. Believe you me, fresh cheese does make a world of difference.

Gather minced shallots, garlic and fresh basil leaves. I picked mine from the herb garden in my patio which is growing beautifully. p.s. expect fresh basil in many more of my summer recipes.

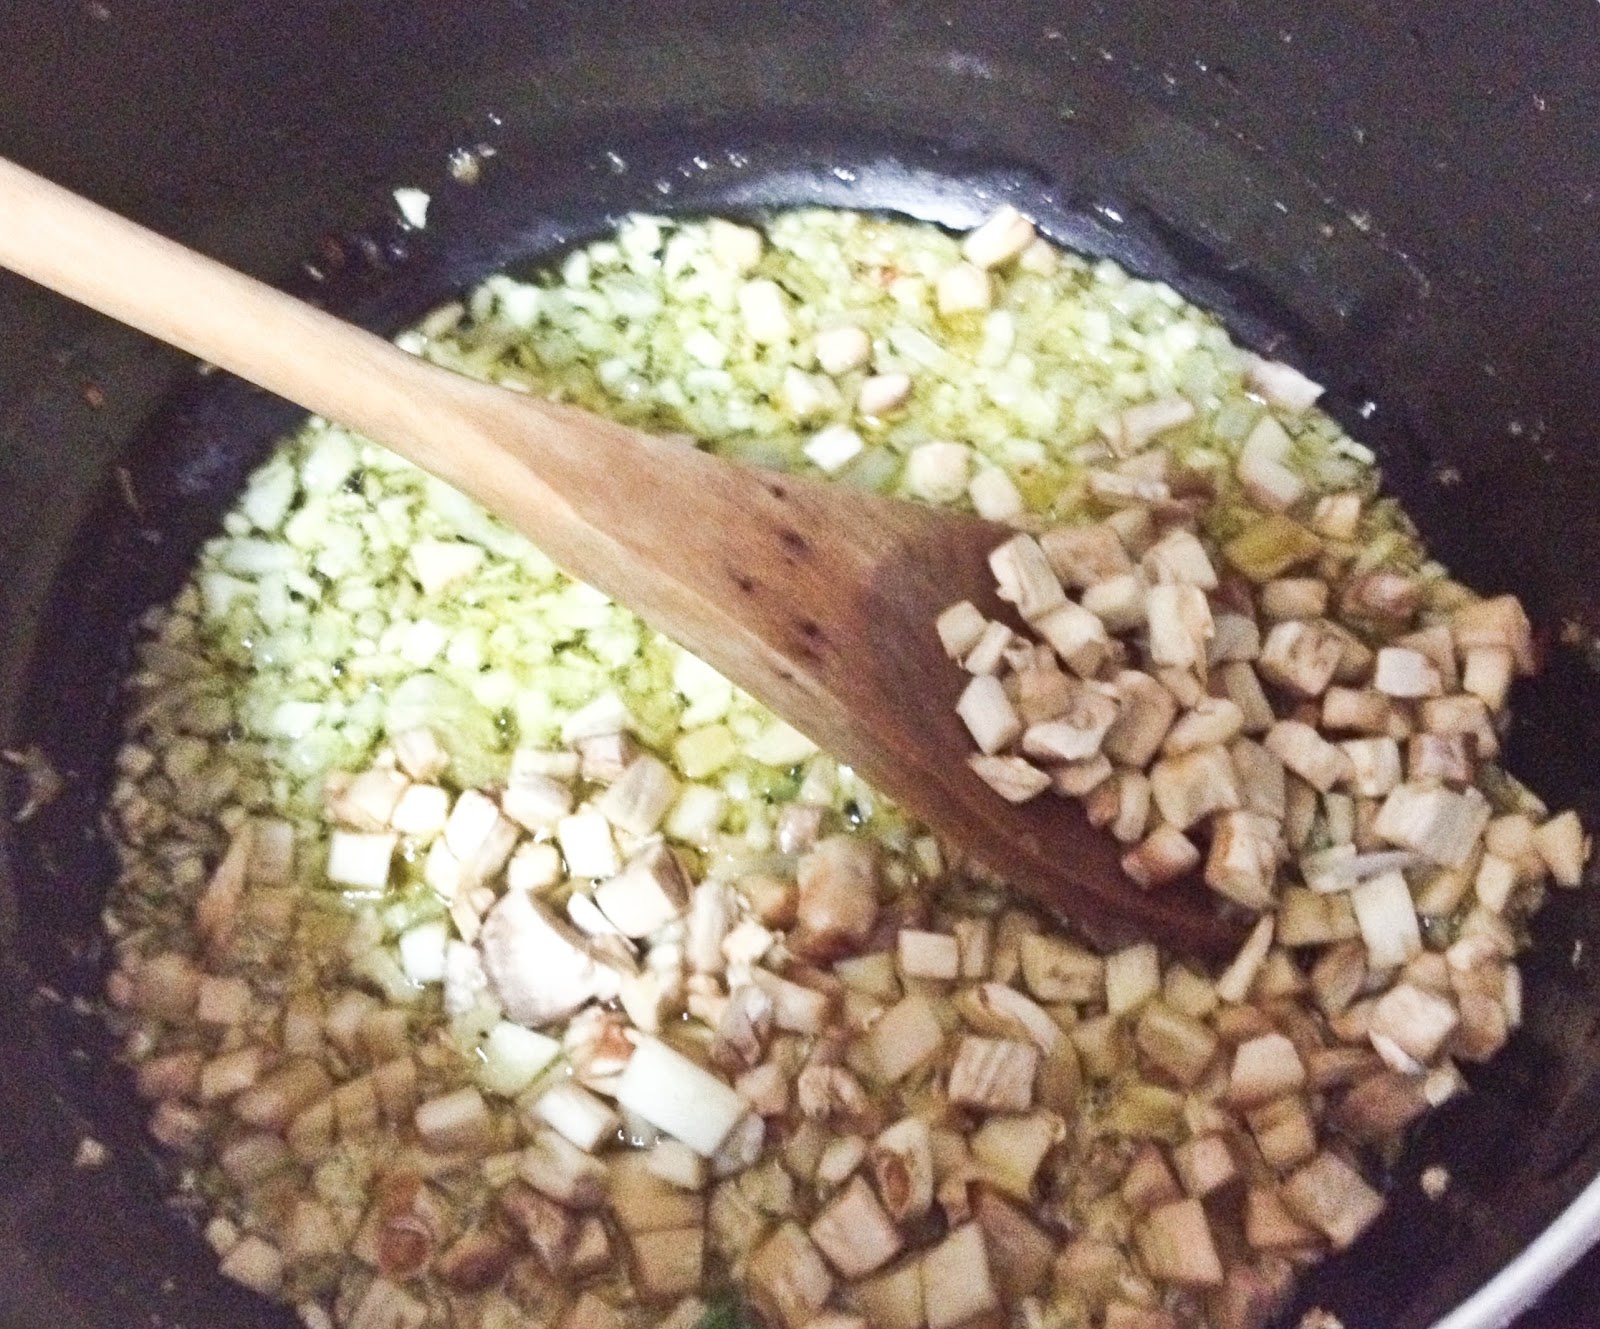
Saute shallots, garlic for a minute or so in olive oil and add the chopped up stems from half the mushrooms.

Cool the mixture and add the rest of the ingredients. Stuff the mushroom really well and quite high and bake on a well oiled baking sheet for 35 minutes at 350 F.Serve warm with julienned basil on top.


Monday, June 25, 2012

Braised Greens for a Meatless Monday

First year of Dental school being done. I'm back to my kitchen again. :)

Not that I wasn't in the kitchen last year, mind you, just not enough to blog about it. But now I'm utterly, completely enjoying the two months I have off before heading back to Philadelphia and back to Dentistry.

Before this vacation's over I promise to post a bunch of new dishes that I've been dying to photograph. Let's start with the simplest one first. Braised mustard greens.

I hate when my green don't retain that deep, bright green hue after being cooked. So I blanch it first and then braise it. You don't have to stick to mustard greens as collards or broccoli rabes taste equally good.

Braised Mustard Greens
1 lb of mustard greens
3 cloves of garlic (minced)
1-2 dry red chilies
2 tablespoon extra virgin olive oil
Salt


Good to know -- A pound might seem like a lot but once cooked you will end up with less than a third of what you started with.


First blanch the greens in a large pot of boiling water that has been salted. To know if you've salted water perfectly, taste it before adding veggies. It should taste like sea water. Be careful to blanch only for a minute or two and then drain the greens in a colander.

Now that you've taken the greens out you can use the same pot for the next steps. On medium heat, saute minced garlic and chilies in olive oil for less than a minute, making sure the garlic doesn't burn. You can choose to take the seeds out of the chilies if you do not like your food spicy, but I usually leave it in.

Add in greens, stir to coat with the lovely oil, garlic, chili concoction. Salt to taste, about 1/4 teaspoon is how I like it. And after a minute add 1/3 cup of water, cook until tender and water has mostly evaporated, approximately 5 minutes.


Monday, January 2, 2012

Sweet Asian Eggplant

Another great eggplant recipe. I'd like to say it's spicy, but it's also sour and a little sweet. It's a melt-in-your mouth eggplant dish you'll want to make over and over again.

1 Eggplant
2 tablespoon Brown sugar
2 tablespoon Apple cider vinegar
2 tablespoon Soy sauce
1 teaspoon crushed pepper flakes
1/4 cup Onion (chopped finely)
4 cloves of Garlic (minced)

Slice the eggplant into 1/2 inch slices.


Put a tablespoon of oil in a non stick pan and fry the eggplant slices till they get soft. Should take about 5 minutes. You don't want to overcook the eggplants at this stage, as it will be cooked in the sweet soy, sugar sauce again.


Once the eggplants have been cooked set it aside. Gather all the ingredients.


Heat up 3 more tablespoons of oil and saute onions, garlic, and crushed pepper.


Add brown sugar to caramelize the onion.


Add in brown sugar and vinegar.


Now gently place the eggplant slices in one layer and cook for about a minute. Gently flip over and give it another minute.


 Be very careful when taking out of the frying pan as the slices will be quite soft. You want the slices ot be soft but not mushy. They should hold their shape.


Stack and serve hot with a side of Jasmine rice.


Sunday, January 1, 2012

Mango Mousse Cake

This is my anniversary cake....which was a couple of days ago. I'm providing a very quick and dirty recipe. Please e-mail me if you have more questions.

Three layers of plain genoise cake, sprayed with simple syrup to keep it moist, topped with chopped strawberries and then layers of mango mousse. For the finishing touch mango miroir glaze is poured on top to give a shiny smooth texture. :)

Genoise Cake
3 Eggs
3 Egg yolks
Pinch of salt
3/4 cup Sugar
1 teaspoon Vanilla
1/2 cup Cake flour
1/4 cup Corn starch

First heat the eggs and sugar on a double boiler till  the sugar dissolves completely. Beat till the mixture doubles in volume and is light and fluffy. Bake in a 9 inch pan at 350 degrees for 25 min or till a knife inserted inside comes out clean. Slice the cake into two layers.

Mango Mousse

1/4 cup Water
2-1/2 teaspoon Gelatin powder
2-1/2 cup Mango puree
1/2 cup Sugar
1 cup Chilled cream

Sprinkle gelatin powder on water and let it rest for 5 minutes. In the meanwhile heat mango puree and sugar over medium heat. After the mixture comes to a boil remove form flame and add in the gelatin. Stir till the gelatin dissolves. Let this cool for 20 minutes. While the mixture is cooling down whip up the cream till it starts to hold its shape. Now gently fold in the mango mixture a little at a time so as not to deflate the whipped cream too much. Keep in the fridge till ready to be used.

Assembling the Cake

Place a layer of cake in a springform pan. Sprinkle chopped strawberries on top. and pour in a 2 inch layer of mousse. Top of the mousse with the second layer of cake. Top of with more chopped berries and another layer of mousse. Place in the fridge for at least 4 hours or over night so that the mousse sets up.

Miroir Glaze

7 ounce Mango juice/ pulp
2-1/2 teaspoon Gelatin
2 ounce water

Soften the gelatin by sprinkling on top of water and let it rest for 5 minutes. Heat the juice till it boils. Remove from heat and add in the gelatin. Wait till this cools down a little. And pour on top of the assembled cake. Chill for a few more hours and your cake is done.

This was the 9 inch cake. The hearts are made with white chocolate.


Same cake, smaller size.


And a bird's eye view for your viewing pleasure.


Frittata with a Touch of Desi Spice

Frittata is a dish very similar to an omelet. Vegetables are sauteed, beaten eggs are poured on top and then cooked on low heat or baked or broiled till the eggs sets up. This Desi flavored frittata uses onions, green chilies, tomatoes and gets its warmth from a little bit of ginger and a touch of cumin. Tastes marvelous with paratha.   

4 Egg whites
8 Cherry tomatoes
Oil
1/4 cup Onion (chopped)
2/3 green chilies
salt
cumin
ginger paste

Chop up onions, tomatoes and green chilies. Cherry tomatoes can be substituted with any other kind. 


Saute onion and chilies in oil till the onion turns translucent. This will take about 2 minutes 


After a while add tomatoes, ginger paste and cumin powder.


Keep cooking till the tomatoes are mashed up. This will take another 5 minutes or so.


Now add in the egg whites that have been beaten with a fork. instead of egg whites feel free to use 3 whole eggs.


Lower the heat and wait for eggs to set. Once you've poured the eggs, do not attempt to stir as you will end up with scrambled eggs. At this stage you can put the entire pan in the oven on broil for a few minutes. 


Or fold it over to give an omelet feel to it. 


Once cooked, plate it up and serve warm with any naan or paratha or any other bread of your choosing.


As always..ENJOY!!


Jalapeno Poppers

Warning!! This dish has the potential to be very very hot. It might make you feel like your mouth is on fire, it can bring tears to your eyes, but who's to say that you won't enjoy that.... 

25 Jalapeno peppers
12 ounces cream cheese
8 ounces shredded cheese (mozzarella or cheddar)
1/2 cup flour
1 egg
1 cup bread crumbs 

I've used both red and green peppers here because they just look so much more cheerful. :)


Slit the peppers in half, leaving the stem intact. Makes for better presentation.


The seeds are where the heat comes from. So de-seed the peppers with your fingers or use a spoon. If using hands wear disposable gloves as these can burn for hours if you are not used to handling peppers. I usually leave a few seeds in there because I simply love the heat.


Mix together cream cheese and the shredded cheese. It's easier to mix if cream cheese is at room temperature. 


Stuff the peppers.


Now the job goes really fast if there is a work station of sorts. Dip the stuffed peppers first in flour, then in egg, and lastly roll it in bread crumbs.


Let the coated peppers rest for about 10 minutes, after which they can be deep fried or baked.


I usually bake these at 325 degrees for 20-25 minutes or till they look golden brown. Serve as an appetizer or a side dish with plenty of water on the side. :)

Thursday, December 29, 2011

Chai Kulfi

My hubby loves a warm cuppa milky tea spiced with cinnamon and cloves and cardamom. And I love the Indian version of ice cream which is kulfi. I saw this recipe on the food network site the other day that combines these two into a hugely delicious, silky smooth Chai flavored Kulfi. I tweaked it a wee bit to make it perfect. I hope you'll enjoy it as much we did.

Chai Kulfi

3/4 cup evaporated milk
2-3 tea bags
1/3 cup condensed milk (add in 1 more tablespoon if you like your Kulfi very sweet)
1/2 teaspoon cardamom powder
1/2 cup heavy whipping cream

Gather all the ingredients together .


I've used 2 tea bags. For a stronger tea flavor add in one more.


Heat the evaporated milk. And once it starts simmering snip the tops off the tea bags and empty contents into the pot. Turn off the heat after a few minutes and cover up the pot so that the tea can steep for about 0 minutes. 


Strain the tea and let it cool down a little. Add in the condensed milk and the cardamom powder.


Whip up the cream till you get soft peaks. This just means that you want the liquid cream to firm up but not so much that it gets chunky. If it whips up to much it gets a little harder to blend it in. 


Afterwards, add in the evaporated milk, tea, condensed milk mixture a little at a time to the whipped cream and mix gently till it's blended together nicely. Don't forget to get the popsicle tray ready in the meanwhile. 


Pour in the mixture, leaving a little space at the top as the Kulfi will expand a little when frozen.


Freeze over night or for however long it takes for the Kulfi to freeze. When you want to eat it take out of the freezer and run hot water over the bottom of the popsicle maker for 30 seconds and try to wiggle the popsicle stick out. if it doesn't work run hot water for 30 more seconds and try again. 


The kulfi should come out beautifully. Enjoy. :)