Monday, August 13, 2012

The Perfect Jilapi (Jalebi)

It's been little more than two months that I've been in Spokane and I'm already deeply in love with the town. It's been a glorious summer and a much needed break after a grueling first year of dental school. But leave I must. I fly out to Philadelphia tomorrow to start my second year of classes. Oh Penn, how I hate you right now. It's hard to imagine three more years of flying back and forth. But, since I've managed to survive this far hopefully I'll live through the rest as well. On the bright side, I do get to see my friends after the break. So it can't be all that bad. Enough with the whining. Let's simply end the summer on a sweet note, making something that reminds us (me and the hubby) of home and warmth and sweetness.

Traditionally sweets, such as the one I talk about today are a very integral part of Bengali culture. They are offered when guests arrive or they are treats that guests bring as gift. There is a warm, soothing quality to it which comes from the gentle use of spices like saffron or cardamom and the rich sweetness solidifies their status as cherished treats. Being deep fried and then soaked in a flavored sugar syrup, it is not the usual end to an everyday meal. But for special occasions there can be nothing better than a Jilapi/ Jalebi.

This is a relatively hard dish to master but the end results are completely worth the pain.

Jilapi batter
1 cup plain flour
1 and ½ tablespoon gram flour (besan, also known as chickpea flour)
1 teaspoon yeast
1 tablespoon oil
1 teaspoon sugar
3/4 cup of lukewarm water

Sugar syrup
1 cup sugar
1/2 cup water
1/2 teaspoon lemon juice -- to prevent crystallization
1/2 tablespoon rose water (optional)
pinch of cardamom powder (optional)


Dissolve yeast in warm water and wait for 5 minutes till the yeast blooms.

Add all the ingredients to make the batter. You can choose to add more or less water to achieve the right consistency, which should be like a pancake batter. Leave aside covered with a clear wrap or a kitchen towel for at least an hour.

If you are making jilapi the next day it's completely ok to stick this in the fridge. Just make sure to take it out at least an hour before you actually fry the batter.

Now onto making the syrup. Heat up the sugar water mixture and stir with a wooden spoon. Boil till you reach a one thread consistency ( at the thread stage there's still a lot of water left in the sugar and the temperature on a candy thermometer should be around  215 degree F or 101 degree C). At this stage, usually I barely touch the spoon with my index finger, then touch the index finger with the thumb and gently pull apart. If one thread is formed then the syrup is done. And you immediately switch off the flame. If you feel that the sugar is getting too thick add a little more water and boil again. If you will be adding cardamom, saffron or rose water do it at the beginning or the end. It really makes very little difference.

Now on to the actual frying bit. Heat up at least an inch of oil in a cast iron skillet or your favorite frying pan. The oil needs to be at a temperature so that when you drop a little batter it sinks for barely a second before rising to the top and sizzling.

Hold the empty bottle or ziplock bag full of jilapi batter (with one end snipped) and pipe concentric circles into the hot oil quickly making sure to join the ends. Speed is your best friend here. Do it slowly an you end up with squiggly jilapi. But it'll still taste good.

Fry the jilapis till they are golden brown on both sides. and set aside.

Transfer the fried jilapi one by one into the sugar water slurry and dip completely for 20-30 seconds. The hollow jilapi will take in the flavored sugar syrup while remaining crispy on the outside.

Serve warm.
Enjoy.
Do not eat everyday.
That is all...

Friday, August 10, 2012

Rose Water Crème Brûlée Infused with Saffron

Crème Brûlée..
I barely have words to describe how delicate this dessert is. My heart gives a little leap of joy every time I break through the thin crisp layer of caramelized sugar to sample (read devour) the velvety smooth custard underneath. And best of all, it is as easy to make as it is delicious. Over the years I've made Crème Brûlée with vanilla beans and never did I consider that such perfection could be improved. But, as always I am happy to be proven wrong. I'm glad to report that flavored with saffron and rose water, this iconic French dessert is elevated to a whole new level. Go on. Buy some saffron this weekend. It's absolutely worth the splurge. Also, if you don't own a kitchen torch you could just leave out the whole caramelization bit, call it rose water and saffron pudding and no one would be the wiser.

Crème Brûlée
1 1/4 cup heavy cream
3 extra large egg yolks (60 grams)
2 tablespoon + 2 teaspoon sugar (40 grams)
1 1/2 tablespoon rose water
1/4 teaspoon saffron

First thing's first. Pre-heat the oven to 325 degrees F.


Then, begin by heating the heavy cream till you see bubbles around the edge of your non stick pan. You do not want the cream to come to a boil. All you need is for it to simmer gently.


Now turn off the heat and add crushed saffron. Give it a quick stir, cover the pot and forget it exists for the next 10 minutes.

In the meanwhile mix the yolk with sugar till it dissolves. You keep mixing till the color of the yolk appears to be a little lighter.

Add the saffron cream mixture (which has taken on a delicate yellow hue by now) to the yolk sugar concoction while stirring continuously. 

You'll see that this recipe does not make a lot. This is because it's hard to stop eating this dessert if there's a lot in the fridge. So, unless you are making for company stick to making small amounts. You waistline will thank me.

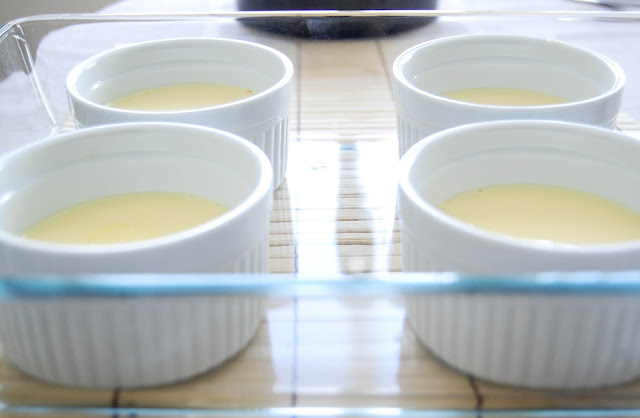
Now back to the recipe. Strain custard into a pourable container (a 2 cup measuring dish perhaps) and pour equal amounts in four ramekins that have been placed in a rimmed baking pan. It doesn't matter whether the pan is made of glass or not. As long the little dishes fit comfortable, you are fine.


Stick the pan into the oven and fill up the pan with boiling hot water so that the ramekins are half submerged in water. Bake for 40-45 minutes or until the custard barely sets. The center should still jiggle when you take it out of the oven. As the residual heat from the ramekins will finish the cooking process.
I can not stress how important this is. To get the best consistency, the custard needs to be taken out before the center's completely set.


Now chill the custard in the fridge overnight or at least an hour or two. I don't know if you've noticed but these are different ramekins, as the first batch was gone before I could take pictures.
                           

Spread a thin layer a sugar on top and caramelize with a cooking torch or a small propane torch available at hardware stores.
 The sugar bubbles and sizzles...

Before settling down to form a crisp layer.

Chill for 5 minutes to cool down the custard. Break open with a spoon.

And cherish every bite

Thursday, August 9, 2012

Chicken Korma

Curries do not necessarily have to be garishly red, or yellow. Nor is it always spicy. Chances are if you have only tried curries in restaurants you have not experienced the full depth and breadth of flavor that mild, creamy curries like this can bring.

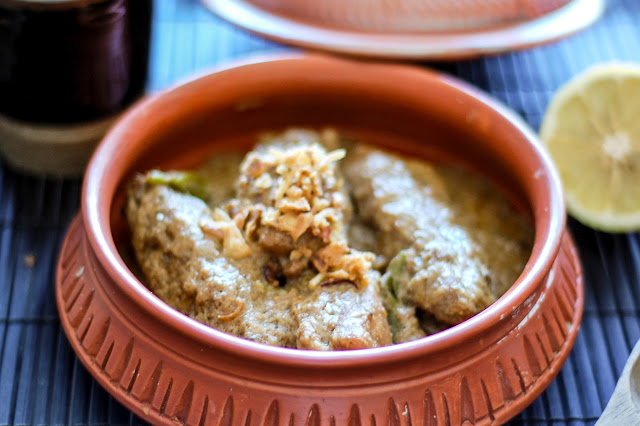
The Chicken Korma is the regal version of curries. Brought to the Indian subcontinent by the Mughal empire, it is subtle, even understated but brimming with flavor. The complexity of this dish comes from the use of nutmeg, mace and poppy seed paste as well the typical spices like coriander and cumin. Although I use milk instead of cream to make it a little healthier, this recipe has deep roots. It comes from my aunt who has been lovingly cooking this dish for us for as long as I can remember.

Chicken Korma (Other than the chicken, ingredients are listed in the order that they are added)

2 lb chicken
1/3 cup + 1 tablespoon oil
1/2 cup onion thinly sliced or minced
1/2 tablespoon salt
1/2 teaspoon garam masala powder
2 tablespoon ginger paste
2 tablespoon garlic paste
1 tablespoon cumin powder
1 tablespoon coriander powder
1/2 teaspoon paprika/ chili powder
1/2 teaspoon crushed black pepper
1/4-1/2 cup water
1/4 teaspoon nutmeg
1/2 teaspoon powdered mace
1 tablespoon poppy seed paste
4 green chilies
1/3 cup water
1 cup milk
1 teaspoon sugar
1/2 tablespoon rose water
1/2 tablespoon kewra water

First off, heat up oil in a 3 qt pan that has a tight lid. Fry the onions till you begin to see caramelization around the edges. The key is to stir the onion from time to time so that the edges turn a rich golden brown. This will take some time, close to 10 minutes but the flavor they provide is essential to good curries. Make sure to add salt at this stage so that the water is steeped out of the onions helping them brown evenly.
Starting to get caramelized. Needs to be cooked for a few more minutes
Now add all the spices up to the black pepper powder all the while cooking over a slow medium heat. You do not want to add water at this stage unless your spices start to stick. The "masala" mixture should be lightly sauteed adding tablespoons of water only if it's absolutely necessary.
A light brown color after all the spices have been added 
Now add the chicken pieces and cook on low medium heat for 10-15 more minutes.

You want the pieces to be evenly coated with the spice mixture.
Evenly coated bone-in pieces of chicken  
Now add 1/4 cup water and continue cooking. The chicken will release its own juices and stew in it. If you want you can definitely use boneless, skinless chicken but chicken pieces, bones and all produces a stock that enriches the sauce. Plus cooking the meat on the bone makes it very succulent.

Not much longer now. We are nearing the end,After 15-20 minutes this is what the dish looks like. When spice mixture becomes thick add nutmeg, mace and poppy seed paste. The poppy seed paste is something that you have to make at home from whole poppy seeds. You have to dry roast the poppy seed and blend with water to make a smooth paste. I can not stress how essential it is for the paste to be smooth. If you feel that the paste is grainy, strain the paste before adding it. You can also choose to leave it out if it is too hard to find but it does add a new dimension to the meal.  

Now add 1/3 cup more water, milk and whole green chilies and cook covered for 10 more minutes.

5 minutes before you take it off the heat add in sugar, salt (do a taste test and only add salt if you think it needs it), rosewater and kewra water.

Serve with a side of naan or polau (rice fried and cooked with whole spices). It doesn't get more authentic than this. :)


Wednesday, August 1, 2012

Aloor Dom

I've been sitting on this for weeks, trying to come up with a translation that would truly explain what "Aloor dom" is to someone who isn't Bengali. Aloo is the Bengali for potatoes, so the easiest name would be "potato curry" but it really wouldn't be right. Curry is just too generic a word to explain this dish which was a quintessential part of growing up in Bangladesh. Served with a side of  Luchi ( a deep fried flat bread very popular in my part of the world), aloor dum was breakfast on weekends for the longest time. One way of making this, is to boil the potatoes till barely cooked through and sauteing in a mixture of spices. It is then simmered in a covered pan over a low flame till the flavors completely permeate the potatoes transforming it into a delightful beginning to a lazy weekend.
p.s. I do know that it's Wednesday. But no harm in planning for the coming weekend.

1 lb Potatoes
4 tablespoon oil
7-8 curry leaves
1/4 teaspoon mustard seeds
1/4 teaspoon whole cumin seeds
2-3 cloves of garlic
1 teaspoon grated ginger
1 tomato
1/2 teaspoon cumin powder
1/2 teaspoon coriander powder
1/4 teaspoon turmeric
1/2 cayenne pepper

I used red, yellow and purple baby potatoes which were cut in half, boiled and then peeled.  You want these to be on the smaller end of the spectrum as the smaller potatoes taste better in this dish.


Heat oil in a flat pan and add curry leaves. After a minute add cumin and mustard seeds. Be careful as the seeds will splutter in hot oil. A process we lovingly called tempering. Very common in Bengali cuisine.
  
Add in rest of the spices along with chopped tomatoes.

Saute for a few minutes adding tablespoons of water if the mixture starts sticking.

Add potatoes. Give it a quick stir to evenly mix everything. You want each piece of potato to be coated. But be gentle as traditionally the dish is served as chunky pieces that are not mashed together.

Add 1/2 cup of water, lower the flame and cover with a tight lid. Water will slowly evaporate and infuse potatoes with flavor, a process known as "dom". Stir once in a while to ensure it doesn't stick.  

Potatoes are ready once most of the water evaporates and you are left with a semi-dry mix of potatoes and spices.